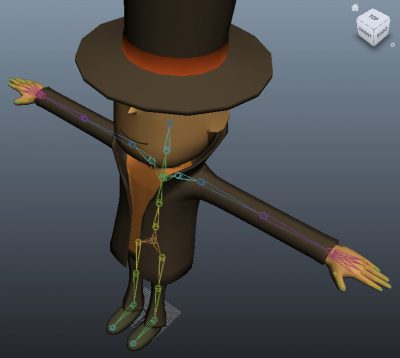
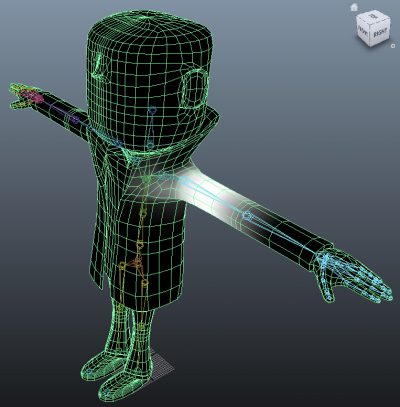
In this article, we’ll talk about setting up a 3D model using Maya and HumanIK, so it can be imported in Unity’s new animation system : Mecanim.
In the first part, we’ll cover the making of the skeleton and skinning.
The second part will be about exporting the model and importing into Unity for Mecanim.
Mecanim & rigging
Unity 4 (that was launched last month) features a new animation system – Mecanim – that uses rigging to greatly improve humanoid characters animation.
Rigging is the process that goes from creating a skeleton, to attaching it to a 3D model in order to animate it in a very realistic way. Mecanim handles rigged models and automatically creates a control rig. That means that you can use “retargeting” to apply an animation to any humanoid character !
But now we need a rigged model to use with Mecanim. Let’s see how we can do it using Maya and HumanIK.
Creating a skeleton using HumanIK
HumanIK is a very handy tool of Maya that will generate human skeletons based on a set of parameters (such as the number of spine bones, number of fingers, etc.). The process is greatly simplified but, as it’s no black magic, we still have some work to do.
Start by opening the HumanIK window (Window > Animation Editor > HumanIK) and click on Create > Skeleton. Then tweak the parameters in the “Skeleton” tab and move the joints so that everything matches with your model. Finally, use the “Orient Joint” tool (in the “Skeleton” menu) and fine-tune joints rotations by selecting them in “component type” mode.
In this process you must pay attention to the following :
- Your scene must be scaled in centimeters. If not, you’ll be in trouble when saving edits of your skeleton.
- Undo might not work when the “Skeleton” tab is opened. Just switch to another tab during editing to fix this.
- Before switching back to the Skeleton tab, be sure to save your work by going to the HumanIK button > Edit > Skeleton > Save Edits.
Skinning
Even with an appropriate skeleton, our model doesn’t move a bit. That’s because the skeleton is not attached to it, and that’s exactly what we’re going to do now.
To start with skinning, use one of the following tools from the Skin > Bind Skin menu:
- “Smooth Bind” that instantly generates an average skin;
- “Interactive Skin Bind” that requires a bit of work but produces better results.
Whichever tool you choose, you will have to polish the skin with the “Paint Skin Weights” tool to correct joints influence and get the best results.
If you need an in-depth tutorial for HumanIK and skinning, go watch this series of video tutorials on YouTube that greatly helped me in the process.
In the next part of this article, we will cover exporting our model and importing it into unity for animating with Mecanim.


